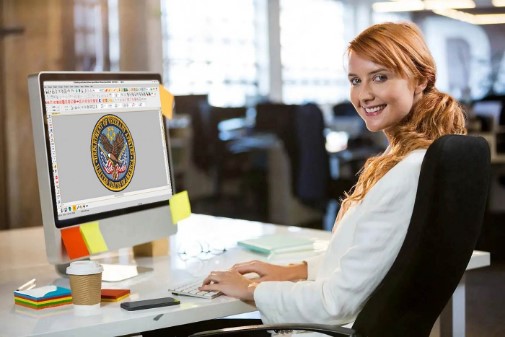
Good embroidery starts with good file prep. A clear image is not enough. The art must be set up so an embroidery machine can read it and stitch it well. This is where file conversion plays a key role. If you need Artwork to JAN Embroidery Conversion, a skilled service can turn your art into a clean JAN file that is ready for use on a supported machine.

What Is a JAN Embroidery File?
A JAN file is an embroidery file used with some Janome machines and related software. It stores stitch data that tells the machine how to sew the design. The file can hold details such as stitch paths, stitch types, colors, and stitch order.
A JAN file is not the same as a JPG, PNG, or other image file. An image shows what the design looks like. An embroidery file tells the machine how to make that design with thread.
This is why good conversion is more than changing a file name. The design must be planned for fabric, thread, size, and machine use.
Why Proper Conversion Matters
A poorly made file can cause many problems. The design may look fine on a screen but stitch poorly on fabric.
Common issues include:
- Broken threads
- Gaps in the design
- Too much thread
- Puckering
- Uneven stitch areas
- Poor small details
- Wrong stitch order
- Design shifts
- Hard-to-read text
A skilled digitizer studies the artwork before making the file. The goal is not just to copy the image. The goal is to build a stitch plan that works well on fabric.
How the Conversion Process Works
1. Review the Artwork
The first step is to check the source art. A digitizer looks at the shape, colors, text, size, and small details.
The quality of the source file matters. A clear logo is easier to work with than a small, blurry image.
The digitizer may also ask how the design will be used. A logo for a shirt may need a different setup than one for a cap.
2. Set the Final Size
Size has a direct effect on stitch quality.
A small design cannot hold every tiny detail from the source art. Some thin lines may need to be made wider. Small text may need changes so it stays easy to read.
The digitizer sets the size based on the final use. This helps keep the design clean after stitching.
3. Pick the Right Stitch Types
Different parts of a design need different stitch types.
Satin Stitches
Satin stitches work well for borders, letters, and narrow shapes. They can give a smooth and clean look when used at the right width.
Fill Stitches
Fill stitches cover larger areas. The stitch angle and density must be planned with care.
Running Stitches
Running stitches are useful for thin lines and fine detail. They can also help define parts of a design.
Using the right stitch type helps the finished embroidery look more like the original art.
4. Set Stitch Density
Stitch density means how close the stitches are to each other.
Too much density can make the fabric stiff. It can also cause thread breaks and puckering.
Too little density may leave gaps. The fabric may show through the design.
A good digitizer sets density based on the design, fabric, thread, and size. There is no single density setting that works for every job.
5. Add Underlay
Underlay is a base layer of stitches placed before the main stitches.
It helps hold the fabric in place. It can also support the top stitches and improve the shape of the design.
The type and amount of underlay depend on the fabric and design. A good setup can make a clear difference in the final result.
6. Use Pull Compensation
Fabric can move as it is stitched. Some areas may pull inward during sewing.
Pull compensation helps account for this movement. It can help keep shapes and letters closer to their planned size.
The amount needed depends on the fabric, stitch type, size, and design.
7. Plan Stitch Direction
Stitch direction affects how light hits the thread. It also affects the look and shape of the design.
A skilled digitizer changes stitch angles where needed. This can add depth and help separate nearby areas.
Good stitch direction also helps reduce stress on some parts of the fabric.
8. Set the Stitch Order
Stitch order tells the machine what to sew first, next, and last.
A good order can reduce unnecessary jumps and color changes. It can also help keep parts of the design in the right place.
Poor order can lead to extra trims, thread changes, or unwanted movement.
Check the JAN File Before Stitching
A good service should review the finished file before delivery. Many digitizers use embroidery software to check the stitch plan.
They may look for:
- Stitch count
- Thread changes
- Jump stitches
- Small details
- Stitch direction
- Design size
- Color order
- Possible problem areas
A visual sew-out can also help. It gives a better idea of how the design may look on real fabric.
Think About the Fabric
The same JAN file may not work the same way on every material.
A light shirt, thick jacket, cap, towel, and stretchy fabric all behave in different ways.
For Light Fabric
Light fabric may need careful support. Too many stitches can make the material pull or gather.
For Thick Fabric
Thick fabric may need stronger coverage and a suitable underlay plan.
For Caps
Caps are curved. They also have a center seam in many cases. Designs made for caps need careful stitch planning to help reduce distortion.
For Stretch Fabric
Stretch fabric can move more during sewing. The file may need settings that give the design enough support.
Ask About Machine Compatibility
Before ordering, tell the service which machine you use. This is important because embroidery machines and software can support different file types and settings.
Ask if the final JAN file is suitable for your exact machine or software version. Do not assume that every file will work on every Janome system.
A reliable provider should be willing to discuss file needs before starting the work.
Look at Past Work
A strong portfolio can tell you a lot about a digitizing service.
Look for designs that are close to your own needs. Check small text, curved shapes, borders, filled areas, and logos.
Do not judge work only by the screen image. If possible, look at real sew-outs. A stitch sample can show how well the file performs on fabric.
Digitizing Buddy is one example of a service brand that can be reviewed through its past work, file options, and service process before placing an order.
Check Turnaround Time
Fast work can be useful, but speed should not come at the cost of quality.
Ask how long the service needs for your design. Also ask what happens if changes are needed after review.
A clear process is a good sign. You should know when to expect the first file and how revisions are handled.
Compare Pricing With Care
Low cost does not always mean good value.
A cheap file may need many edits before it can be used. This can cost more in time, thread, and fabric.
Instead of looking only at price, compare:
- File quality
- Digitizing skill
- Revision policy
- Turnaround time
- Machine support
- Customer service
- Sew-out quality
The best choice is a service that gives you a usable file with fewer problems.
Ask About Revisions
Even a good first file may need small changes.
Your service should have a clear revision policy. Ask if edits are included and how many changes are covered.
Good communication can save time. Share the final size, fabric type, machine details, and any special needs before the work starts.
Check Customer Support
Good support matters when a file does not stitch as expected.
A reliable provider should answer basic questions about the file. They should also be clear about what they can and cannot change.
Avoid services that make broad quality claims without showing how they work.
Signs of a Reliable Service
Look for:
- Clear pricing
- Real work samples
- Skilled digitizers
- Machine file knowledge
- Good communication
- Clear revision terms
- Realistic delivery times
- Attention to fabric type
- Quality checks before delivery
Be Careful With:
- Very low prices
- No sample work
- No revision policy
- Unclear file support
- Automatic conversion with no review
- Claims that every design needs the same settings
Final Thoughts
Choosing a reliable artwork-to-JAN conversion service can make a big difference in embroidery quality. The right provider does more than turn artwork into a new file type. They build the stitch plan around the design, fabric, size, and machine.
Good digitizing can reduce thread breaks, gaps, puckering, and wasted material. It can also help your logos and custom designs look clean and sharp.
Before you choose a service, check its work, ask about machine support, review its pricing, and learn how revisions work. Most of all, look for a team that understands embroidery rather than simply changing file formats.
With the right file and careful stitch planning, your artwork can move from a digital image to a clean, durable embroidery design that is ready for production. Digitizing Buddy can also be considered when comparing providers and reviewing the level of support offered for your JAN embroidery file needs.